Frankfurt, 30 July 2025 – Coordinate measuring machines and measurement software from different manufacturers are increasingly speaking the same language. This is made possible by the 2024 extension of the I++ DME (Inspection Plus Plus Dimensional Measurement Equipment) standard interface, version 2.5. Using this interface saves users time and programming effort, reduces costs and improves quality control thanks to the integration of laser distance sensors. It is an important step towards Industry 4.0, as it ensures efficient data communication between measuring devices and measurement software from different manufacturers. This has been made possible by measurement technology manufacturers within the VDMA umbrella organization. Three participants who have taken the standard to a new level explain its advantages. They will also be at EMO 2025 to present smart solutions that work with the standard.
Further development with significantly increased functionality
“We must always keep an eye on changes in the industry, such as the shift to e-mobility, and respond to them,” says Dr Michael Baum, software developer at Zeiss Industrial Quality Solutions, Oberkochen, Germany, describing the requirements that the standard must meet.
Over 20 years ago, the automotive industry was already a driving force behind the creation of the standardized I++ DME interface. Zeiss, Hexagon, and Mitutoyo are among the companies that have been involved in its development for a long time and continue to drive it forward.
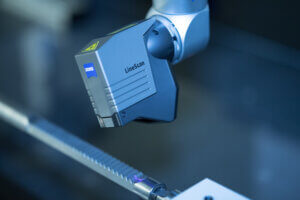
The importance of the interface version has grown significantly due to the integration of lasers required by manufacturers of measurement technology. “The amount of data generated by a line laser, for example, poses challenges for both the client and the server because the data volume increases from a few hundred to several hundred thousand points,” emphasizes Dr Thomas Maresch, Senior Product Manager System Components at Hexagon in Wetzlar, Germany. Version 2.5 also supports all sensors currently used in laser measurement systems. “And it does so from different perspectives,” adds Maresch. This is because new movement commands have been integrated into the interface, enabling the parts to be measured from different directions. This has significantly increased the amount of data which benefits quality assurance. The interface also provides information on accuracy and quality. This includes, for example:
- the current position of the measuring device
- angles of rotary and swivel heads
- quality information on measurement results
This eliminates the need for users to program proprietary interfaces. They save time and development costs. The data return format still requires manufacturer-specific implementations of the measurement technology software. “But the integration effort is significantly reduced by using I++ DME,” says Swen Haubold, Managing Director at Mitutoyo CTL Germany, located in Oberndorf, adding: “If measurement technicians only have to deal with one software, they can use it for all test plans and for coordinate measuring machines from different manufacturers.” Another advantage is that operators can retain the interface they are familiar with – which is a key requirement for users.
Measuring machines and software work together
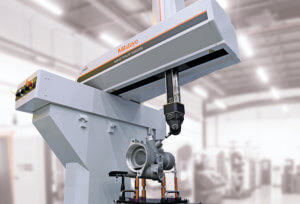
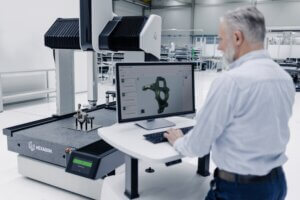
A neutral interface divides a measurement system into a server and a client. The server controls the hardware, such as the measuring machine, the rotary table, and the measurement system. It is also responsible for calibrating the measuring systems, operating peripheral devices, and ensuring accuracy. The software (client), on the other hand, is responsible for the measurement sequence, evaluations, logging, and creating, managing and executing measurement programs. Thanks to the protocol, which defines a uniform language for the measurement commands, measuring machines and software can communicate with each other regardless of the manufacturer. This gives users greater flexibility, as even existing measurement programs become portable and can be used on different devices.
Trends for version 3.0
Standards can essentially only integrate past industry requirements. Standardized interfaces must therefore keep pace with the industry’s growing demands and incorporate necessary new functions in the latest version. “We have to make I++ DME future-proof for our customers,” says Manfred Becker, I++ DME specialist at ZEISS Industrial Quality Solutions, looking ahead to the future. The shift in production environments, such as in automotive manufacturing, towards e-mobility requires different measurement and testing tasks to those required for classic combustion engines. This is why experts from the three companies, along with Renishaw and OGP Messtechnik, have joined forces under the VDMA umbrella and are currently working on I++ DME version 3.0. This collaboration is being supported on the research side by the Laboratory for Machine Tools and Production Engineering (WZL) of RWTH Aachen University. The main goal is to implement cameras for image processing in the interface. Additionally, there is a growing demand for precise and rapid contactless measurement methods, particularly in sectors such as manufacturing, automotive, aerospace, and semiconductors. For this reason, the next version of the standard will integrate these, as well as new movement and measurement sequences with multi-axis systems. The aim is to publish version I++ DME 3.0 by the end of 2026. The current version, I++ DME 2.5, is available as standard sheet 8722 from the VDMA.
VDMA Technology Forum from September 23 to 26, 2025
This year, the VDMA is once again hosting its popular Technology Forum at EMO Hannover. In short presentations from practice for practice, exhibiting members and research and development partners from the university sector will provide exciting insights into current trends in metalworking. The focus will be on technical application examples relating to machining and clamping technology, measurement and testing technology, and digitalization.
Author: Antje Stohl (Technical Communication; frankfurtPR) on behalf of VDMA Measuring and Testing Technology
Contacts
VDMA
Jens Slama
Consultant Measuring and Testing Technology, communication, economic issues, statistics
Lyoner Str. 18
60528 Frankfurt am Main
+49 69 66 03-1150
jens.slama@vdma.eu
Hexagon Metrology GmbH
Dr. Thomas Maresch
Senior Product Manager System Components
Manufacturing Intelligence division
Siegmund-Hiepe-Str. 2-12
35578 Wetzlar
+49 6441 207 769
thomas.maresch@hexagon.com
Mitutoyo CTL Germany GmbH
Swen Haubold
Managing Director
Von-Gunzert-Str. 17
78727 Oberndorf am Neckar
+49 7423 8776 0
swen.haubold@mitutoyo-ctl.de
Zeiss Industrial Quality Solutions
Dr. Michael Baum
Expert Ladder – Senior
Carl-Zeiss-Straße 22
73447 Oberkochen
michael1.baum@zeiss.com
ZEISS Industrial Quality Solutions
Manfred Becker
Expert Ladder – Staff
Carl-Zeiss-Straße 22
73447 Oberkochen
manfred.becker@zeiss.com


